How to Choose a Rubber Deflashing Machine?

Choosing a Rubber Deflashing Machine is a process decision, not simply a matter of comparing prices. The right equipment should remove flash without damaging the part’s edges, dimensions, or surface. Start with the rubber compound, part geometry, flash thickness, and expected production volume. A thin-walled seal may need gentler handling than a thick, molded component. Small details matter.

Compare the available methods, such as cryogenic deflashing and mechanical trimming. Each suits different parts and production needs. Ask suppliers for trials using your own components, not just polished demonstration samples. Check the finished parts under consistent lighting, and inspect edges for tears, residue, or unwanted wear. Review cycle time, loading effort, maintenance access, and the availability of replacement parts. A machine that performs well in a short test may still create bottlenecks during a full shift. There is no universal best choice.

A practical guiding line for this article comes from Daniel Mercer, a fictional rubber-processing specialist created for this example: “Choose for the part you actually make, not the sample that looks easiest to finish.” This is an illustrative quotation, not a verified statement from a real expert. That distinction matters when evaluating equipment claims. This guide will help you frame the questions, compare machine capabilities, and identify trade-offs before requesting a formal quote. Bring real production data. It can expose assumptions that a brochure leaves untouched.
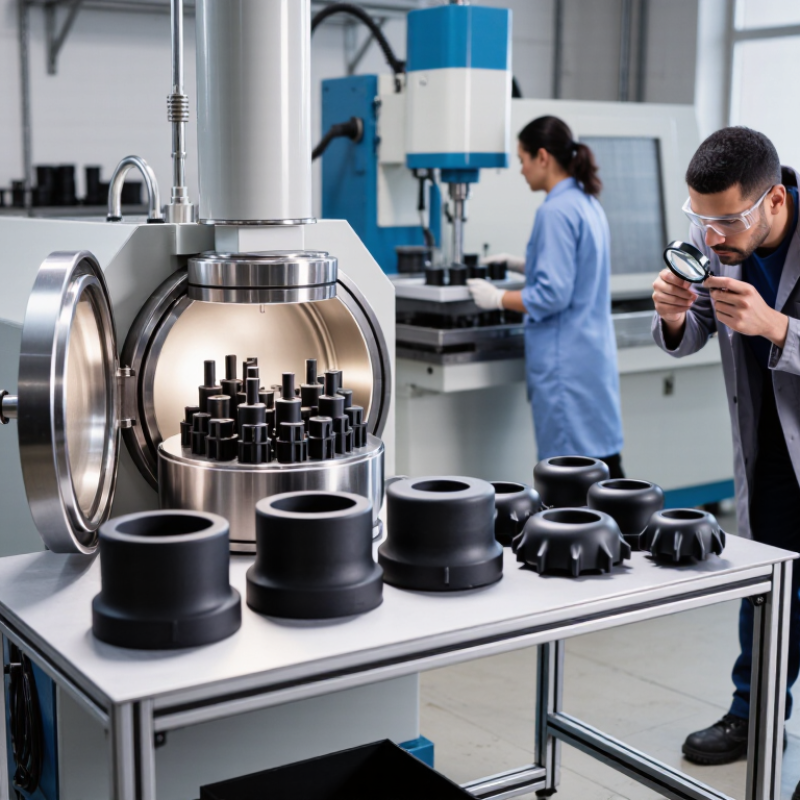
How to Choose a Rubber Deflashing Machine?

Identify Your Rubber Parts and Deflashing Requirements

Start with the rubber part, not the machine. Record its elastomer type, Shore A hardness, dimensions, and wall thickness. Note where flash appears: along a parting line, around a thin lip, or inside a groove. Small details matter. A delicate edge may tear under aggressive tumbling, while thick flash may need more processing energy. Define the acceptable edge condition, especially if the part must seal or contact another component.

Next, estimate daily volume, part-size variation, and required cycle time. The International Rubber Study Group’s 2024 World Rubber Industry Outlook estimated global rubber demand at about 31.9 million tonnes for 2024. That figure describes the industry’s scale, not your production needs; your own part mix should guide capacity decisions. Compare candidate methods using molded samples. Cryogenic deflashing may suit complex shapes, while mechanical methods can be practical for robust parts. Results depend on the compound and geometry.

Ask suppliers to process representative parts, including the most fragile and heavily flashed examples. Inspect edges under magnification, then check dimensions and sealing performance. Keep the trial conditions: part temperature, media, cycle time, and batch loading. One awkward detail: production parts may vary more than sample parts. If a trial looks perfect, repeat it with parts from another batch before choosing a machine.

Compare the Main Types of Rubber Deflashing Machines

Rubber deflashing methods differ in how they remove thin flash and protect the molded part. Cryogenic machines cool rubber until its flash becomes brittle, then use tumbling media or a controlled blast to break it away. They suit small, complex parts with many fine edges, especially when hand trimming would be slow. However, settings depend on the rubber compound, part thickness, and load size. Too much exposure can damage delicate features.

Mechanical tumbling machines use friction between parts and media to wear away flash. They can process batches efficiently, but parts may scuff or become tangled if their shape is unsuitable. Automated trimming systems use knives or cutting tools for more targeted removal. They work well when flash locations are predictable and dimensions need close control, though tooling and setup can take time. Manual trimming remains useful for prototypes or low-volume runs. It is flexible, but results can vary between operators.

Check the finished edges closely. A shiny surface can hide leftover flash, while a rough edge may signal excessive action. Compare cycle time, labor, media use, and rejected parts—not just machine price. A short production trial often reveals more than a specification sheet. No method wins every time. Part geometry and rubber behavior can make the choice less obvious than expected.

Match Machine Capacity and Features to Your Production

Choosing a rubber deflashing machine starts with the parts, not the largest capacity listed in a brochure. Estimate your normal batch size, daily output, and acceptable cycle time. A machine rated for 40 kilograms may not suit your line if bulky parts fill the chamber before reaching that weight. That matters. Part shape, rubber hardness, and flash thickness can all change how many pieces process effectively in one load. Ask for a trial using representative parts, including awkward shapes and the thickest flash you regularly see.

Match features to the work your operators actually perform. For cryogenic deflashing, check chamber capacity, loading method, temperature controls, and how media is separated after processing. For other machine types, confirm that the process fits the rubber compound and surface finish requirements. Small details count. A wide access door may reduce loading time, while simple controls can make recipe changes less error-prone. Review cleaning and maintenance access, too; difficult-to-reach areas can become a recurring production problem. Compare realistic output from sample runs, not just rated capacity. I would leave room for uncertainty: estimates often miss changeover time, scrap checks, or a batch that needs a second pass.

Evaluate Safety, Maintenance, and Operating Costs

When choosing a rubber deflashing machine, examine the actual hazards at the workstation, not just the brochure. Check guarding, interlocked doors, emergency stops, noise, and access for clearing jams. For cryogenic systems, ask how operators handle cold media and monitor ventilation. Small details matter. The U.S. Bureau of Labor Statistics reported 2.6 million nonfatal workplace injury and illness cases in private industry in 2023. That figure is not specific to deflashing, but it is a useful reminder to assess exposure and training before purchase. Ask to observe a full production cycle, including setup and jam recovery.

Maintenance can quietly raise the cost per accepted part. Request service intervals, wear-part prices, expected replacement frequency, and typical repair times. Then estimate energy, compressed air, labor, consumables, scrap, and downtime over the machine’s intended life. NIST Handbook 135 describes life-cycle cost analysis as a way to compare purchase and recurring costs across an analysis period. Use that approach to compare quotes, rather than choosing the lowest initial price. The awkward part: supplier estimates may not match your rubber compound or shift pattern. Run a sample batch with your own parts, record cycle time and rejects, and ask what assumptions shaped the estimate. If maintenance access is cramped, even a minor service task can interrupt production.

Test Machine Performance and Verify Supplier Support

A rubber deflashing machine should prove its value on your actual parts, not through a catalogue speed claim. Ask the supplier to test difficult samples: thick flash, deep grooves, and parts close to tolerance limits. Record good parts per hour, residual flash, surface marks, rejects, and changeover time. Repeat the trial after stopping and restarting the machine. One run proves little. The 2024 True Cost of Downtime report estimated losses at 11% of annual revenue for the world’s 500 largest companies. That is not a machine-specific forecast, but it shows why dependable output matters.

Request a written test record with sample details, settings, and pass criteria. Check whether results hold across different batches and operators; a perfect demonstration can hide setup sensitivity. Ask about technician response times, operator training, maintenance instructions, and lead times for common wear parts. Get these commitments in writing. Then verify them with a practical question: who helps when flash remains in one cavity during a busy shift? A fast reply matters. So does clear troubleshooting advice. If the supplier cannot explain how it will diagnose inconsistent results, pause before comparing prices. A low-cost machine may still require costly trial and error.

How to Choose a Rubber Deflashing Machine? - Test Machine Performance and Verify Supplier Support

Evaluation Area What to Test or Verify Practical Acceptance Check Record During the Trial
Deflashing effectiveness Run representative parts with the actual rubber compound, geometry, and flash condition. Agree on acceptable residual flash locations and limits before testing; inspect parts under consistent lighting and magnification. Parts meeting criteria, residual flash findings, and inspection method.
Part damage and quality Check for cuts, cracks, surface marks, deformation, or unwanted material loss after processing. Compare processed parts with approved quality samples and applicable drawing tolerances; assess critical features before and after the trial. Defect count, dimensional results, and pass/fail decision.
Cycle time and throughput Time complete production-representative cycles, including loading, processing, unloading, and routine handling. Calculate good parts per hour from repeatable runs, not from processing time alone; confirm the result meets the required production rate. Cycle time, batch size, handling time, and accepted parts per hour.
Repeatability Repeat the trial using the same settings and comparable batches; include parts from more than one production lot where possible. Confirm that quality and cycle time remain within the agreed limits across repeated runs. Results for each run, settings used, and any variation observed.
Process setup and changeover Have an operator change recipes or settings and switch between representative part types. Verify that settings are documented, repeatable, and accessible to authorized operators; check the time and tools required for changeover. Setup steps, changeover time, training needs, and recipe controls.
Utilities and consumables Measure or document electrical demand, compressed-air use, process media, and other consumables under the proposed operating conditions. Compare actual requirements with available site utilities and estimate operating cost per good part using local prices and expected production volume. Utility specifications, consumption per cycle or hour, and consumable replacement intervals.
Safety and workplace conditions Review guarding, interlocks, emergency stops, operator access, noise, dust or emissions, and any process-specific hazards. Confirm the machine documentation identifies applicable hazards and required controls; assess the installation against local regulations and site procedures. Risk assessment, safety documentation, measured noise where required, and unresolved actions.
Maintenance and cleaning Inspect routine access points and ask the supplier to demonstrate cleaning, wear-part checks, and basic fault diagnosis. Verify that maintenance tasks, intervals, required tools, and replacement parts are clearly documented and practical for the site. Maintenance schedule, estimated task time, wear parts, and recommended spares.
Installation and acceptance Review footprint, access for loading and service, utility connections, foundation needs, and installation responsibilities. Require a written installation and acceptance plan with agreed test parts, process conditions, quality limits, and sign-off criteria. Layout, connection requirements, schedule, acceptance protocol, and responsibilities.
Supplier training and service Confirm operator and maintenance training scope, service contact channels, coverage area, and support availability. Obtain written response-time targets, warranty terms, escalation steps, and the process for obtaining technical assistance and spare parts. Training deliverables, support hours, response commitments, warranty, and parts lead times.
Final decision Compare machine results and supplier commitments against the same written requirements. Select only after the production trial meets agreed part-quality and capacity criteria and support terms are documented. Trial approved: Yes / No   |   Open actions: ____________________

Note: Acceptance limits depend on the rubber compound, part design, flash condition, and production requirements. Define them with the quality and process teams before the machine trial.

Build your system. Protect your boat. Join the movement.

Compare Products
Talk to Sales