A Wood Strip Wall can change a plain room with warm grain, clean lines, and a little depth. The installation still depends on careful preparation. A bowed wall can leave uneven gaps, while a misplaced first panel can shift every strip that follows. Measure the full surface, check for level, and locate studs before cutting. Small checks matter.
Design expert Charles Eames said, “The details are not the details. They make the design.” That idea applies to wood strip panels, too. Consistent spacing, aligned edges, and neat cuts around outlets shape the finished look. Yet appearance is only part of the job. Check the panel maker’s instructions for approved adhesives or fasteners, and confirm the wall is dry, sound, and suitable for the chosen system. There is no single method for every panel or substrate.
This guide explains how to plan the layout, prepare the wall, make accurate cuts, and secure each panel. You’ll also learn where to pause and recheck alignment. A simple dry fit can reveal a problem before it becomes permanent. Even careful work may expose an uneven corner or a visible seam. That is worth noticing, not hiding. Good installation is less about rushing toward a perfect photograph and more about making sound decisions at each step.
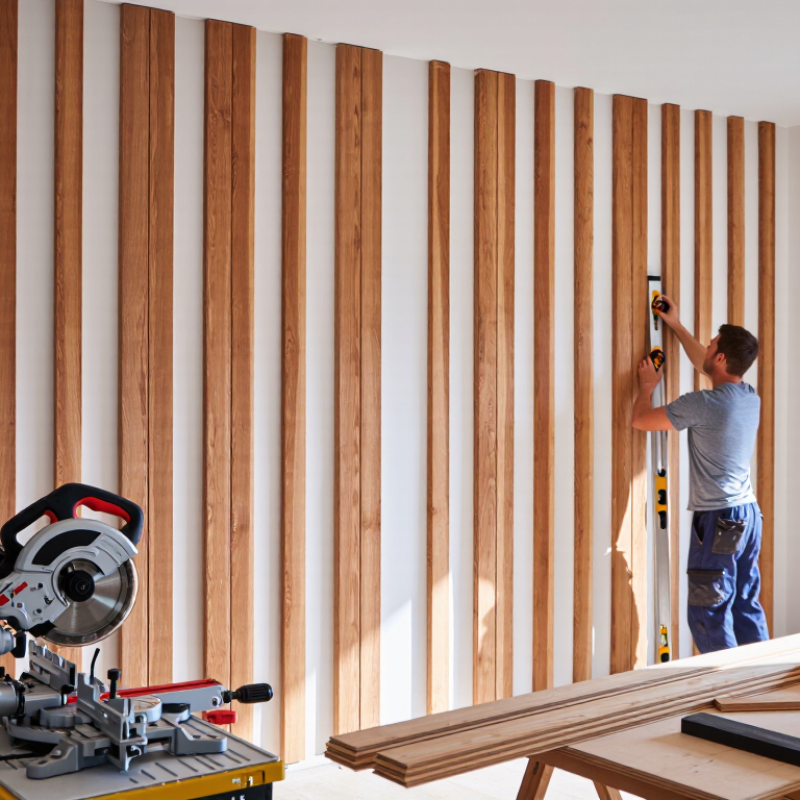
Before installing wood strip wall panels, inspect the wall in daylight and with a long straightedge. Check for bulges, dips, loose plaster, damp patches, and peeling paint. A wall that looks flat can still bow; don’t rely on sight alone. Repair uneven areas and address moisture before covering them. The USDA Forest Products Laboratory’s Wood Handbook (FPL-GTR-282) explains that wood moisture content shifts with surrounding humidity. Its equilibrium-moisture tables show roughly 6–9% moisture content at 70°F and 30–50% relative humidity. Let the panels adjust to the room as their installation instructions require.
Next, map the layout before cutting. Measure wall width and height at several points, since corners and ceilings are rarely perfectly square. Mark outlets, switches, trim, and door openings. Find and mark studs with a detector, then confirm their positions; the 2021 International Residential Code allows framing configurations to vary, so assumed spacing can lead to missed fixings. Sketch the panel run and calculate its end pieces. A narrow final strip can look unbalanced, so shift the starting line to create more even cuts at both ends. Dry-fit a few strips, check the plumb line, and revise if needed. It may feel slower. It usually prevents awkward gaps and avoidable recuts.
Before installing wood strip wall panels, gather a tape measure, level, pencil, stud finder, saw, drill, and safety glasses. Keep a dust mask nearby for cutting. Check the panel instructions to confirm whether you need adhesive, screws, or both. Lay out the panels in the room for the recommended acclimation period. This helps limit movement after installation. Measure the wall in several places; floors and ceilings are not always level. Mark studs and plan where the first and last strips will sit.
Tips: Dry, clean, flat. Remove loose paint, dust, and protruding nails. Fill dents, then let repairs dry fully. A small ridge can throw off an entire row, so check the wall with a straightedge. Wear eye protection when cutting, and support each strip to prevent splintering.
Pause before covering the wall. Look for damp patches, peeling paint, or soft areas, and fix the underlying issue rather than hiding it. If the surface is uneven, decide whether it needs patching or a suitable backing layer. I would recheck the first layout line, even when it seems right; one rushed mark can leave a narrow, awkward strip at the edge. Keep the work area clear, and follow the panel maker’s guidance for fastener spacing and substrate preparation.
Measure the wall in several places; floors and ceilings are rarely perfectly level. Record the narrowest and widest dimensions, then mark outlets, switches, corners, and trim on a simple sketch. Let the wood strips rest in the room for at least a day, following the product’s care guidance. This helps reduce surprises from changes in temperature or humidity.
Cut a few strips to length first, using a fine-tooth saw and supporting the wood to limit splintering. Wear eye protection, and keep fingers clear of the blade. Check each cut against the wall before preparing the rest. Then arrange the strips on the floor in installation order. Dry-fit them against the wall, checking spacing, grain direction, and how the edges meet corners. A small gap may look harmless on the floor but become obvious near a doorway. Adjust the layout before fastening anything. I once rushed this check; one uneven edge meant recutting a strip.
Tips: Label the back of each strip with its position. Use spacers to keep gaps consistent. If a wall bows, pause and reassess rather than forcing the wood flat.
Before fixing wood strip panels, locate every stud with a stud finder and mark its centerline in pencil. Check the wall for bowing; even a small ridge can leave a panel visibly proud. Hold the first strip level, then fasten it through the panel and drywall into the framing with suitable screws. Choose a length that gives secure stud engagement without risking hidden wiring or pipes. A missed stud is hard to forgive. I still recheck the marks.
Use a level across several strips as you work, and keep screw heads snug rather than crushing the wood surface. Where a strip does not align with framing, use a wall anchor rated for the panel and expected load, following its installation instructions. Predrill near strip ends to reduce splitting, especially in dry or brittle wood. Leave the expansion gap specified by the panel maker. The USDA Forest Products Laboratory’s 2021 Wood Handbook reports equilibrium moisture content of about 6.2% at 70°F and 30% relative humidity, rising to about 12% at 65% humidity. That change matters: wood can move after installation. Acclimate panels in the room, and don’t force tight joints just to make the lines look perfect.
| How to Install Wood Strip Wall Panels? — Attach the Panels Securely to the Wall | ||||
|---|---|---|---|---|
| Installation Step | Wall Preparation | Secure Attachment | Spacing or Measurement | Check Before Moving On |
| Inspect the wall | Remove loose material and check that the surface is dry, clean, and reasonably flat. | Repair unstable plaster or drywall before installing panels. | Use a straightedge to identify significant high or low spots. | Do not fasten panels over damp, crumbling, or loose surfaces. |
| Locate the wall framing | Use a stud finder, then confirm stud positions with a small test mark or suitable method. | Plan to drive panel screws through the panel’s backing and into the studs. | Wood studs are commonly spaced 16 inches on center; verify the actual layout. | Mark each stud line vertically so the fixing points remain visible during installation. |
| Plan the panel layout | Measure the wall and arrange panels to avoid narrow, awkward cuts where possible. | Position panel edges and fixing points so they align with the manufacturer’s instructions. | Check the wall width and panel width before making cuts. | Dry-fit the first panel and confirm the planned edge and corner positions. |
| Set the first panel | Establish a straight starting line with a level or laser level. | Hold the panel in position and drive suitable screws through its backing into the marked studs. | Keep the panel plumb; leave any movement gap specified by the panel manufacturer. | Recheck level before fully tightening the fixings. |
| Fasten the panel securely | Use screws appropriate for the panel, wall covering, and framing material. | Ensure screws engage the studs rather than relying only on drywall or plasterboard. | Place fixings at the stud locations and follow the panel maker’s recommended number and spacing. | Do not overtighten; the panel should sit firmly without crushing or distorting its backing. |
| Continue across the wall | Keep adjacent panels aligned and support each panel while fixing it. | Fasten each panel into the available studs using the same approved fixing method. | Check alignment at every panel joint and along the top and bottom edges. | Correct misalignment before installing the next panel. |
| Finish edges and inspect | Trim edges carefully and fit any specified edge or corner finishing pieces. | Confirm all required fixings are installed and secure. | Use the manufacturer’s clearance and finishing details around floors, ceilings, and openings. | Check that panels are stable, joints are even, and no screw heads are protruding. |
| Safety and fixing note: Check for hidden electrical cables and plumbing before drilling. Fastener type, length, and spacing depend on panel construction and the wall; follow the panel manufacturer’s installation instructions and local requirements. | ||||
When the wood strips reach a corner or doorway, measure each cut twice and test-fit the trim before fastening it. A narrow molding can cover a small edge gap, but it should not conceal a visibly crooked panel. For an outside corner, use a clean miter and check the joint from eye level. Let the wood breathe. Keep any expansion space recommended for the panel material, especially near ceilings and floors.
Inspect the installation in daylight and again with a lamp held close to the wall. Raking light makes raised edges, glue marks, and uneven spacing easier to spot. Check several rows with a straightedge, and press gently along the panels to find loose sections. Listen for movement. A faint click may point to a missed fastener or an uneven spot behind the strip. Look closely. Also confirm that outlets, switches, and trim remain accessible and sit neatly against the finished surface.
Remove pencil marks and adhesive residue using a method suitable for the wood’s finish; test it on a hidden offcut first. Fill small nail holes with a compatible filler, then sand lightly once it has dried. Avoid forcing a stubborn edge into alignment with extra pressure. That can split the strip or shift its neighbors. A tiny gap may still show under certain lighting, so judge the repair from normal viewing distance before making another cut.
Build your system. Protect your boat. Join the movement.